

We have been studying so much about ship voyages lately (Leif Erickson-Columbus-the Pilgrims) that I thought it would be appropriate to make some lighthouses. I had seen terra cotta planter lighthouses before and I loved them but I knew they would be too cost prohibitive to do at school.
Instead I found this fantastic tutorial for cheap and easy lighthouses at Danielle's place.
These were perfect! I think I spent a total of 50 cents per lighthouse. They would make a great project for Cub Scouts or Activity Day girls. They would also be fun to make on a rainy or snowy day just for fun!
I think they would look fantastic as a centerpiece on a holiday table. I don't have photographs of all the steps. But Danielle walks you through everything and she has a fantastic pattern for the windows, ladders and railing. She also has an elaborate roof pattern. We elected not to use that pattern for our lighthouses. The kids wanted to go without roofs.

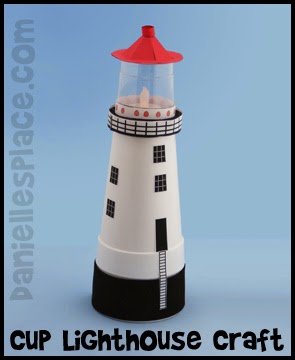
I did make a roof for mine by cutting a piece of red paper in a circle and then cutting a slit so that I could fold it into a cone.


Three 20 oz. foam cups
1 clear plastic cup (We used 16 oz. plastic cups)
1 Sheet of Black Fun Foam for the Base
1 Battery-Operated Tea Light
1 Sheet of Card Stock Paper to Print out the Windows etc.
Glue
Red Paper for Roof if Desired
We used black Electrical Tape for our stripes. I think Red Washi Tape would be gorgeous for a red stripped lighthouse! I just didn't have any on hand.
(Note: I couldn't find a plastic cup that would fit nicely on top like Danielle's so we just cut our plastic cups to fit)

Wouldn't this make a darling nightlight in a nautical themed room! All you need to do is lift the lid and turn on the candle each night.
No comments:
Post a Comment